 Meena Barsoum
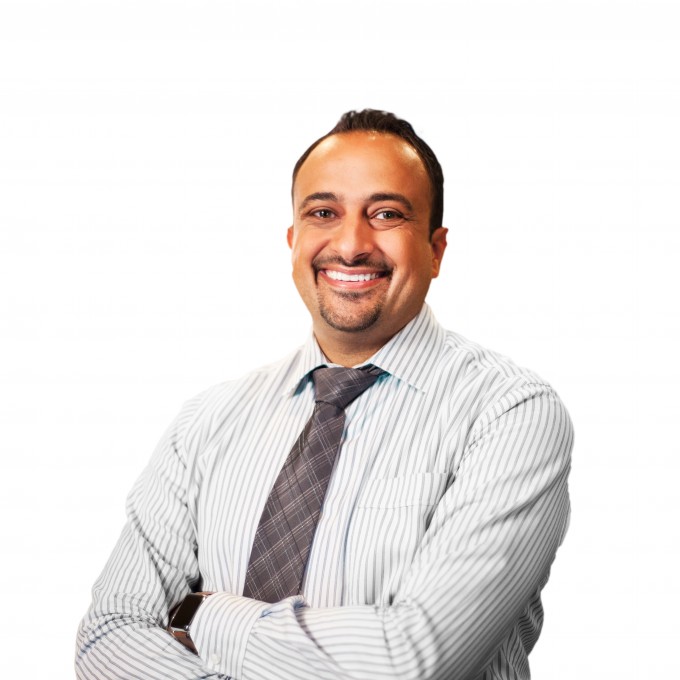
 The Spear Facially Generated Treatment Planning workshop I took early in my career had a massive impact on the amount of comprehensive dentistry I can now see and diagnose and present to my patients. Often the initial discussion I need to have with patients is either orthodontics or periodontal surgery. Using various smile design techniques to describe the possibilities to patients can only go so far. We can’t force a patient to follow the right sequence and often times we have to make compromises to achieve a stable and healthy dentition. I present to you Greg.
Greg came to my practice initially in 2013 as a new patient. We captured our standard new patient documentation - photos, scans, 3D imaging, etc. (Fig 1 - Smile), (Fig 2 - Lip at Rest), (Fig 3 - retracted anterior). I showed Greg his outlived composite bonding on his incisors, and the crowding, supereruption and malocclusion. I created a detailed presentation on what orthodontic treatment could do - positioning the teeth in a more ideal location, making the restorations more conservative and balancing the gingival heights and contours.
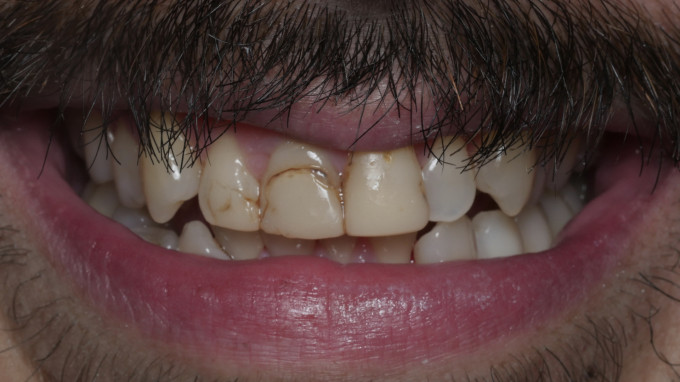
Figure 1

Figure 2
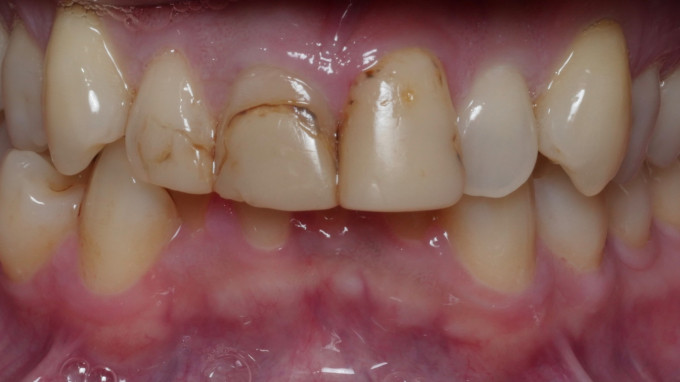
Figure 3
Fast forward to 2021 - I have now presented the same comprehensive treatment option to Greg 16 times - think 2 periodic exams each year. My team would joke about how much time I would spend discussing this case knowing without a doubt he will decline ortho like he has for the last 8 years. But today he presents with a slight change in his dentition. The large composite bonding on his centrals is failing and the anterior radiographs we captured today are showing recurrent decay and we now need to make a restorative decision before the situation gets worse (Fig 4 - Anterior PA images).
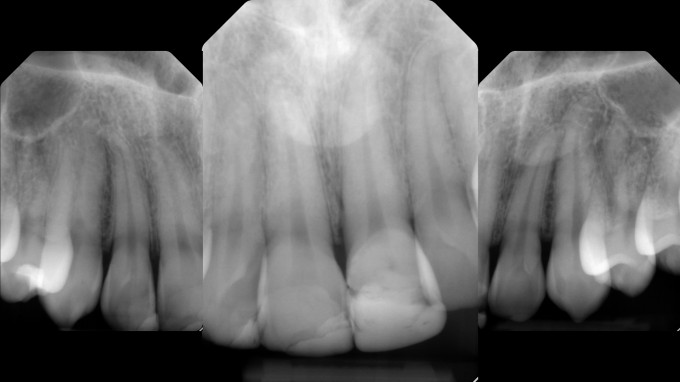
Figure 4
One option is to deliver new composite buildups and attempt to bond the teeth again. Another option is to restore the teeth with porcelain. Here in lies the challenge - the malocclusion leaves the centrals and laterals in different facial planes (Fig 5 - Occlusal View). Surprisingly Greg was interested in improving the appearance of his anterior teeth, however he declined orthodontics with a very colorful emphasis on “no”. We decided to restore his 4 incisors with porcelain restorations, and I captured a full arch scan with the Primescan and sent it to my lab technician Bill Marais at Disa Dental Studio (Fig 6 - STL files of existing arches).
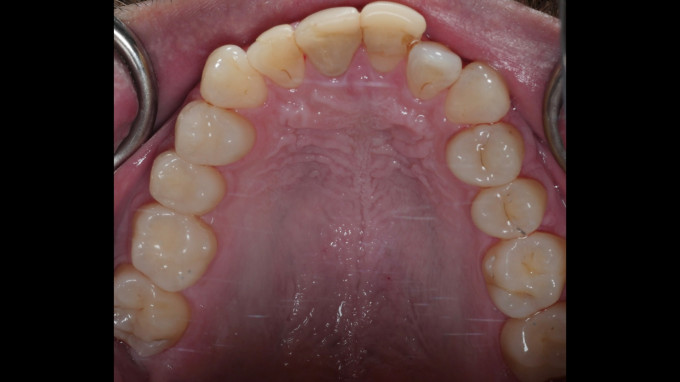
Figure 5
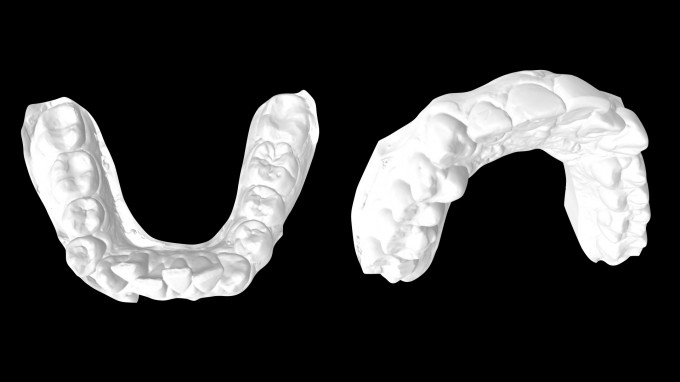
Figure 6
Today I am delivering my chairside anterior restorations by using digital wax-ups from a master ceramist like Bill. It creates a much more predictable scenario and expedites my design time, improving the esthetic outcomes. Bill sends me a digital file of the wax-up (Fig 7 - STL of Wax-up) which I can either print and scan as a Biocopy or use inLab and import the original STL to design the case. However, the same issue arises, how do I know where to end my reduction? If you look at Greg’s tooth position in relation to his wax-up, some teeth are purely additive, and some will be purely reductive. I still want to be conservative with my preparations, so I need some form of guidance. We use guides for Implants and Endo, why not use a guide for anterior preparations? One technique is to roughly prepare the teeth, and then transfer the wax-up and perform depth cuts through it. Another technique is to use a merged wax-up file that can seat passively over the unprepared teeth (Fig 8 - Merged Wax-Up). I simply fabricate a Copyplast matrix of this merged model, after I 3D print it in my office (Fig 9 - Seated Copyplast of Merged Wax-Up, note it’s passively seating). I can then transfer that merged wax-up using any bisacryl material (Fig 10,11 - Transferred Wax-Up).
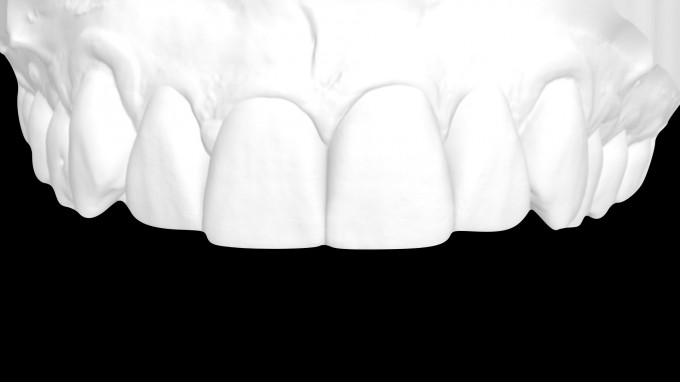
Figure 7
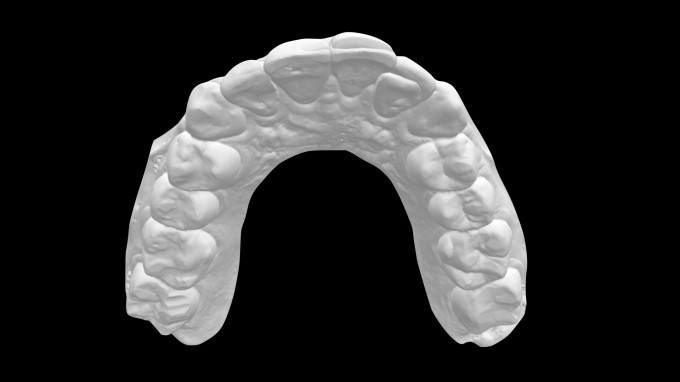
Figure 8
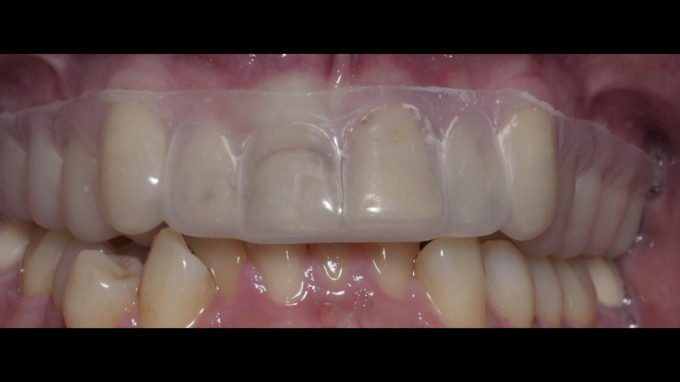
Figure 9

Figure 10

Figure 11
From here, I can easily perform my depth cuts through the wax-up and finalize my preparations (Fig 12 - depth cuts through transfer, note tooth #10 will be purely additive). Once the preparations are complete (Fig 13 - Final Preps), I can use inLab to merge my prep STL with my wax-up STL (Fig 14 - Final Design). Note the wax-up from the lab required some gingival contouring or crown lengthening, which unfortunately the patient declined (Fig 15 - Biocopy, note the apical positioning of the ideal gingival margins).
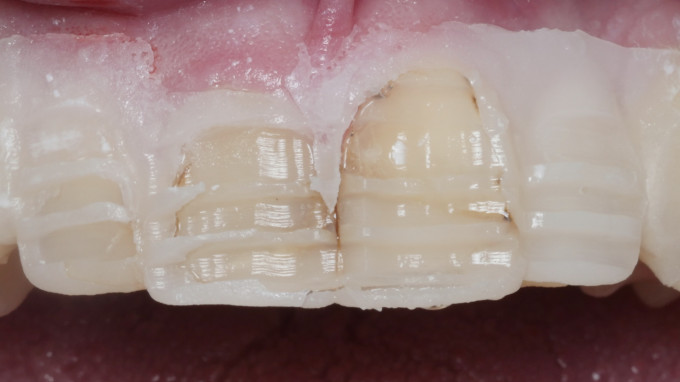
Figure 12
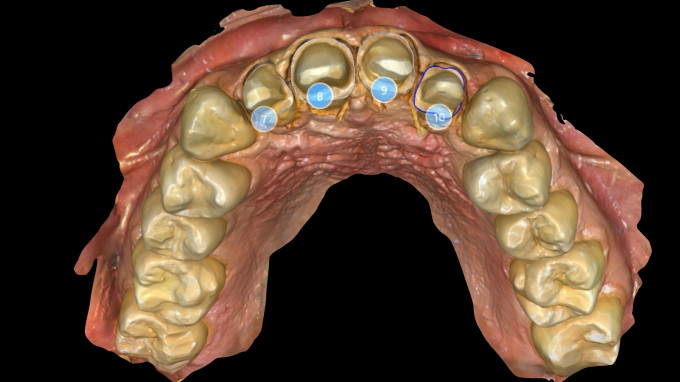
Figure 13
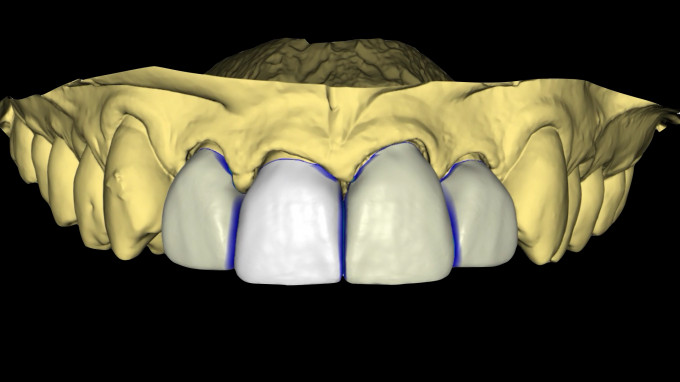
Figure 14
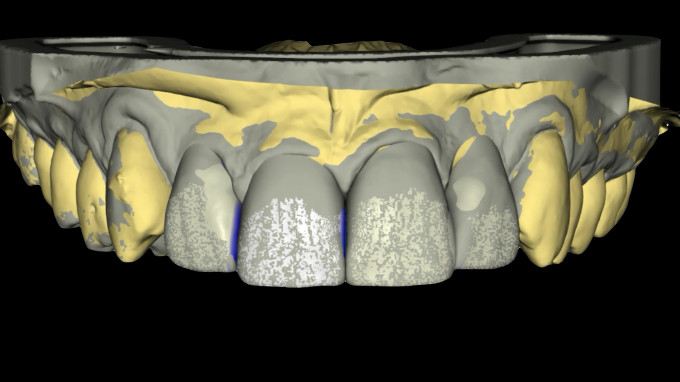
Figure 15
After grinding the restorations, printing a model and contouring the ceramic to refine the line angles and anatomy, the restorations are seated (Fig 16 - Seated Restorations 7-10). You can see the compromise we were left with, gingival asymmetry and the obvious crowding and malocclusion on the lower arch. However, we left him with a comfortable bite and tight contacts that he can now floss and maintain better than before. (Fig 17 - Final Smile) (Fig 18 - Retracted Smile), (Fig 19, Before/After). Now all we need to do is convince him to trim his mustache a bit so we can see his beautiful new smile!
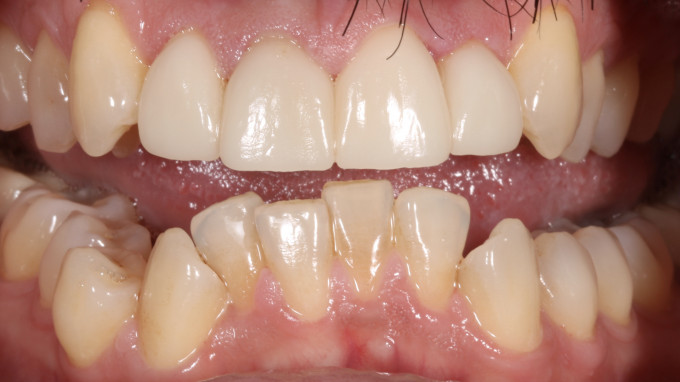
Figure 16
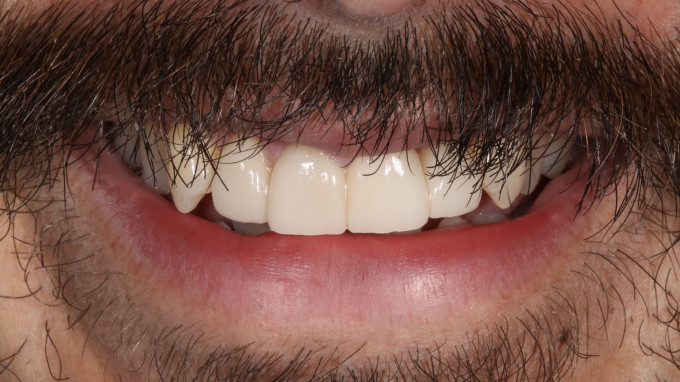
Figure 17
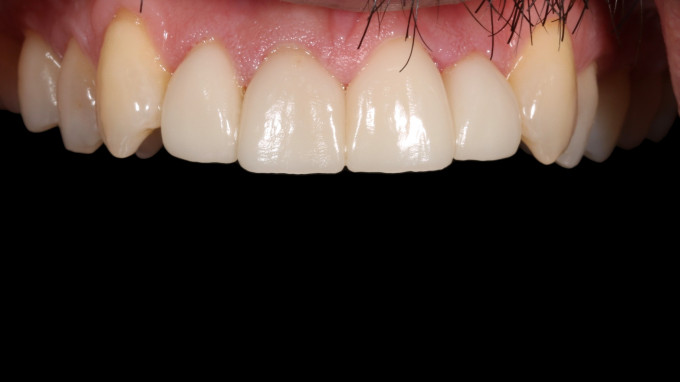
Figure 18
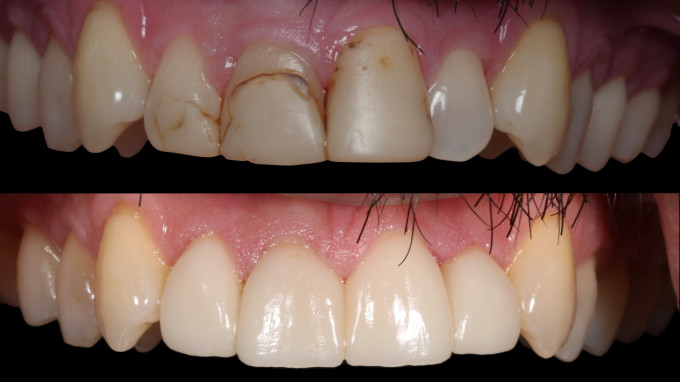
Figure 19
While it’s always best practice to recommend ideal comprehensive dentistry, sometimes our patients just won’t do it. Ultimately, we can still provide an esthetic, biological and functional improvement while knowing the compromises in advance.