 CDOCS Staff
 Dr. Douglas Smail, Dr. Sabita Smail, and Chelsea Herr; East Hudson Oral & Maxillofacial Surgery, Troy, New York
For a fixed hybrid prosthesis, before the age of digital dentistry, fabrication of the master cast followed by the final prosthesis 3-4 months after the implants were integrated consisted of a tedious and time-consuming analog process, requiring much coordination between practitioners along with a lab technician. This process included well-choreographed steps beginning with an initial impression to make a custom tray which would be used at the following appointment. After receiving it from the lab, this open or closed custom tray would then be used to take an impression of the prosthetic impression posts attached to the implants for the lab to fabricate the verification JIG. Along with this impression, the dentist would also have to take a lower impression to verify the occlusal bite and record the facebow transfer along with the bite registration at the appropriate vertical dimension (Figure 1).1,6 An esthetic try-in of the verification JIG would then be done at the next appointment to confirm the smile line of the denture (may need to be sectioned and luted together with GC Resin if it does not fit passively). With the approval of both the patient as well as the practitioner, all materials would be sent back to the lab for the final fabrication of the prosthesis.1 In total, these 3 appointments could take up to 4 weeks to complete.
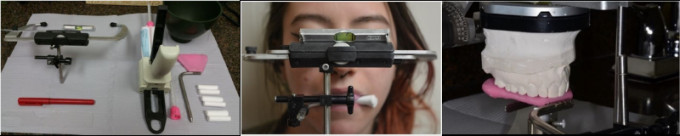
Figure 1. Facebow transfer materials and procedure.6
For the digital workflow using the CEREC Primescan (Dentsply Sirona), an iJIG is fabricated in one appointment as opposed to the three appointments for the analog verification JIG. Not only is the iJIG method faster but also allows for more precise imaging of the transitional fixed hybrid, resulting in fewer fit alterations with the ability to capture the edentulous ridge (Figure 2). This is done with a scan of the upper/lower denture in the mouth along with the bite followed by the removal of the provisional for the scanning of the placed scan bodies on the denture, maxillary or mandibular arch, and gingival mask. This process can be completed for both or just one arch depending on what the patient needs. All virtually constructed images are then sent via Sirona Connect to the lab for the fabrication of the iJIG. This allows the lab technician to be in direct contact with the restorative dentist for the try-in phase of the prosthesis. Once this is complete, the patient returns to have a try-in appointment of the iJIG.
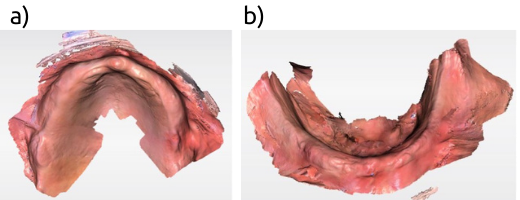
Figure 2. Edentulous ridge of maxilla (a) and mandible (b) captured using the CEREC Primescan.
Case Study:
A 60-year-old male presented with chief complaint; “I don’t want to keep fixing my teeth anymore and I want to have a fixed denture on the upper and the lower.” Primescan imaging was done of his upper and lower dentures as well as the ridge along with a bite registration and CBCT to determine if the patient had enough bone for implants. All data was sent to the lab to plan for his fixed hybrid prosthesis. A WebEx was scheduled with his surgical and restorative team which included the surgeon, restorative dentist, PRD from the surgeon’s office, and the lab technician. (All data collected at this first appointment as well as surgical planning can be seen below.)
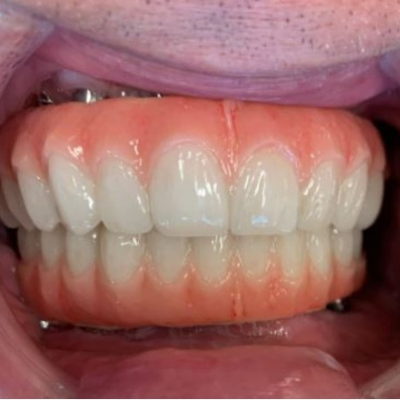
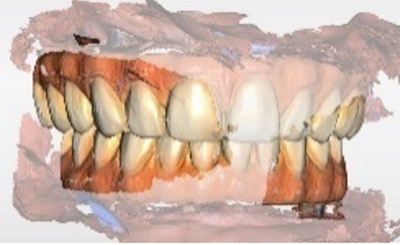
A Chrome GuidedSmile type prosthesis was the resulting treatment seen below (Pre-operative to post-operative radiographs for 60-year-old male dual arch, fixed arch prostheses. [Picture of the prosthesis in place.])
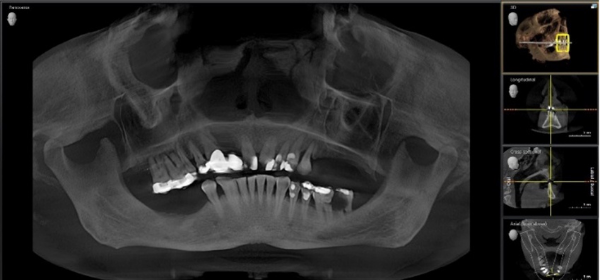
Pre-operative CBCT.
Initial scans using the CEREC Primescan.
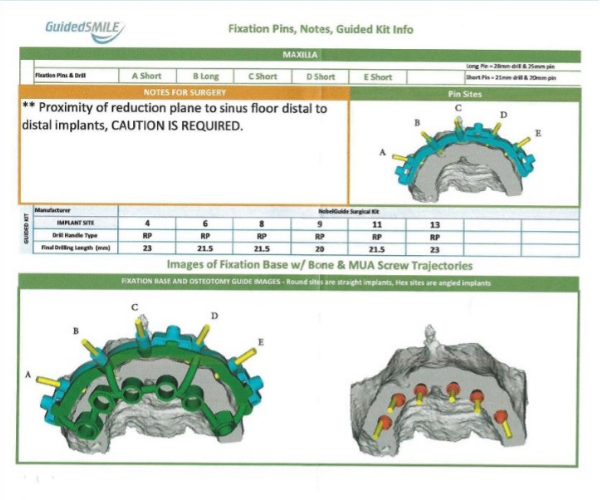
Chrome GuidedSmile treatment plan.
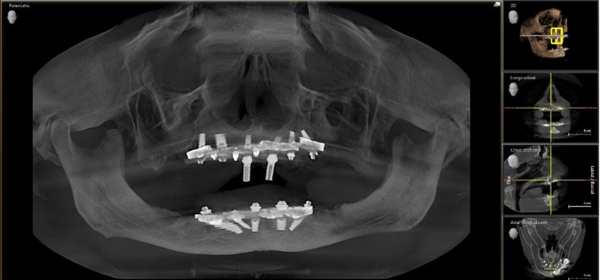
Intra-operative CBCT.
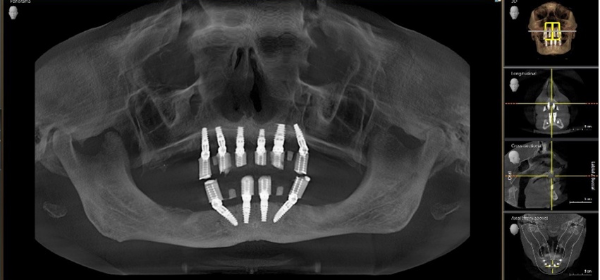
Post-operative CBCT.
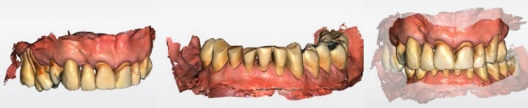
Post-operative conversion with interim prostheses present.
In short, the CEREC Primescan has enabled many advances for not only practitioners but also patients, reducing chair time and overall expense. Because of the high acuity achieved using the CEREC Primescan, it has been recognized that fewer revisions are needed in order to achieve a satisfactory result compared to the lengthy process associated with the analog verification JIG method. Below, a breakdown is provided for the number of appointments needed in the analog workflow (three appointments) compared to the digital CEREC Primescan iJIG workflow (one appointment). In total, the digital iJIG method saves two one-hour appointments.
Comparison of analog verification JIG to iJIG method using the CEREC Primescan.
Appointment 1
Analog Impressions/Stone Models
3 to 4 months after implants are placed, the final prosthesis workflow is started.
Take models to have lab fabricate a custom open tray:
1. Take an impression of upper/lower and bite
2. Remove denture and take impression of maxilla/mandible
3. Take clinical photos (7)
4. Send impressions to lab for custom open tray
CEREC Primescan Digital Workflow
1. Maxilla
a. scan upper denture with scan bodies in
b. scan gingival mask
c. scan of the upper with denture in

2. Mandible
- scan lower denture with the scan bodies
- scan gingival mask
- scan the lower denture in the mouth

3. Take a bite registration of the upper and lower (VDO)
4. Send materials to the lab with clinical photos.
*Records vertical dimension, accounts for soft tissue texture, and replaces the verification JIG as well as becomes the first esthetic try-in all while creating a working model for occlusion.
Appointment 2
Analog Impressions/Stone Models
Custom tray received from lab and is loaded.
- Remove denture
- Screw open tray analog copings onto implants in the mouth
- Take open tray impression
- Complete implant fixed level impressions
- Buy impression posts before the next appointment
(LAB) Send materials to lab for master cast to be fabricated and initial jaw relations.
(LAB) Analog is then sent to the lab to make the initial cast for the fabrication of the verification JIG to confirm the accuracy of the initial impression and jaw relation record.
CEREC Primescan Digital Workflow
Clinician receives iJIG from lab. This is placed in the mouth to verify passive fit and serves as the final impression.

Appointment 3
Analog Impressions/Stone Models
Verification JIG is sent back to dentist for confirmation of jaw records.
1. Establish ideal anterior tooth length, lip support, occlusal plane, VDO, and midline along with facebow transfer and bite registration
- Take an impression of mandibular arch
- All materials sent back to the lab
If the verification JIG does not fit accurately and seat passively:
- JIG is sectioned, screwed onto the implants and reconnected with GC Pattern Resin from which a new master cast is made (same when fabricating a denture)
- Establish ideal anterior tooth length, lip support, occlusal plane, vertical dimension, and midline along face bow transfer and bite registration recorded at the vertical dimension of occlusion
6. Impression of the mandibular arch
(LAB) All materials sent back to the lab, casts are mounted and diagnostic wax-up completed of the teeth as well as the soft tissue for the fabrication of a simple bis-arcyl try-in prosthesis (an alternative approach is to place denture teeth representing the desired tooth form and soft tissue on the verification JIG). This is done to establish the desired anterior and posterior tooth position, occlusal plane, and vertical dimension as well as the occlusion (like a wax try-in for a complete denture).
(LAB) Lab fabricates a new provisional prosthesis to accommodate any changes that need to be made.
If no changes are made, the bis-acryl try-in prosthesis can be used for the provisional prosthesis (this requires direct communication with the lab so that the bis-acryl prosthesis is fabricated appropriately).
Appointment 4
Analog Impressions/Stone Models
Clinician receives verification JIG from lab.
Acknowledgements
This article was a collaborative effort with the National Director for MicroDental Laboratories, Chuck Genco.
References
- Dichter, Darin, D.M.D, Spear Faculty and Contributing Author. Conventional complete denture fabrication in 9 steps. Spear, October 21, 2015.
- Genco, Chuck. National Director, Clinical Technology Solutions of MicroDental Laboratories. MicroDental Laboratories.
- The iJIG, CHROME GuidedSmile and GuidedSmile Components. ROE Dental Laboratory. Retrieved from https://www.roedentallab.com/products/chrome-guidedsmile/chrome-guidedsmile-components/chrome-ijig/#records
- Winters, Bob, D.M.D, Spear Faculty and Contributing Author. Steps for fabrication of an implant-supported prosthesis. Spear, March 19, 2018.
- CAD/CAM Titanium Bar/Acrylic Denture. Hybrid Denture Protocol. Haupt Dental Lab Inc.
- Ledger, Dave St., (February 23, 2016). 9 Steps to a Facebow Transfer. Spear Education. Retrieved from https://www.speareducation.com/spear-review/2016/02/9-steps-to-a-facebow-transfer