 Jeremy Bewley
 With all the recent interest in Azento and Astra EV, I thought I'd share a case with a couple of tips to help you avoid a couple of complications I encountered during a procedure.
In this case, the patient was referred for an evaluation with suspicion of a fracture; the referring doc was unable to do find the fracture, and after I looked at her I could not locate it either. 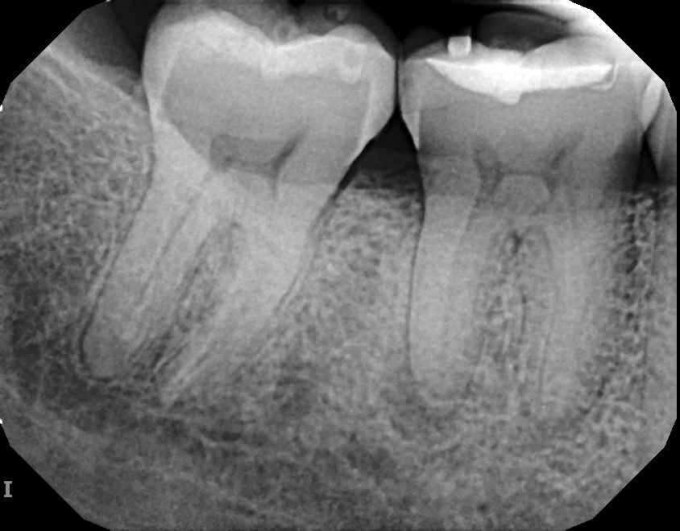
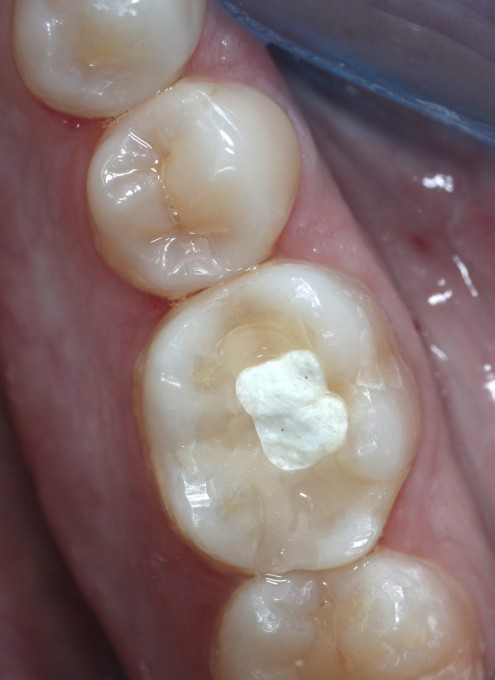
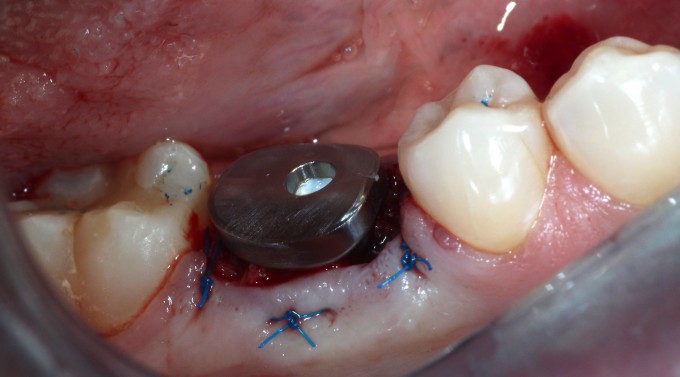
I sent the patient to my excellent endodontist, who after accessing was able to find a fracture on the distal and returned her to me with a hopeless diagnosis for #30. We went through the now routine and simple process of capturing CBCT and CEREC digital impression, and uploading them for Azento case analysis and production. With the available interradicular bone, I opted for an immediate placement. Azento digitally removes the tooth and designs the guide as if it were already extracted. As this patient would be returning to her referring doctor for the final prosthesis, I chose the custom healing abutment solution only. When the patient came in for surgery she looked like this:
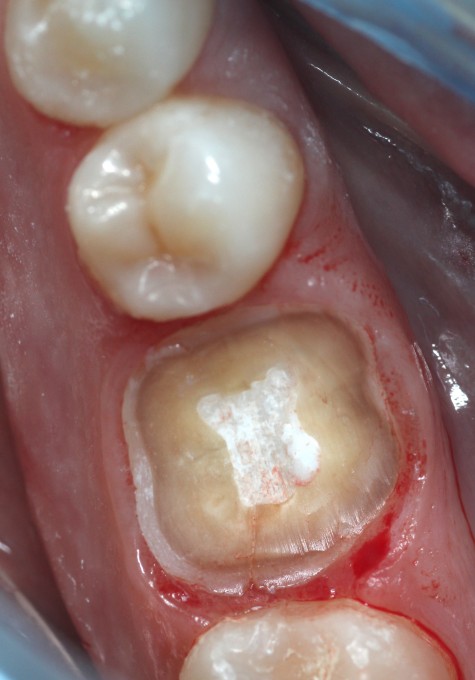
Obviously the guide won't fit with the tooth in place, so the first step is to perform a coronectomy. I will typically use a 557 carbide to undercut the tooth following the gingival contours, first from the buccal and then from the lingual until the clinical crown becomes mobile. My assistant will keep the surgical suction on the occlusal of the tooth to keep it from relocating to new territory in the lung or gut. Once the clinical crown is safely gone, I will use whatever large coarse diamond is on hand (either a large football or an 845KR) to finish it down to where the guide will clear it. Try not nick or abrade the soft tissue too much as you do this.
I prefer to complete the osteotomy with the roots in place; there are a few excellent threads detailing this process here on the boards. One of the benefits of this is that the distal curve of the mesial root that many mandibular first molars have is obliterated during the drilling process. This particular root is often the cause of difficult or complicated extractions. Once the osteotomy is complete, it's usually a fairly simple process to remove what's left of the roots and then thoroughly curette and irrigate the site with saline. When curetting the socket in cases like this one where there was some periapical pathology, spend as much time as necessary to achieve clean, bleeding walls. Once that is done, the implant is placed through the guide to the appropriate depth and orientation to accommodate the custom healing abutment; remember that one of the benefits of using EV and an Atlantis custom abutment is that the abutment fits only one way, and the guide helps you position the fixture so that it is timed correctly. Once the implant is placed (in this case we achieved approximately 25 Ncm on implant insertion), a good practice to follow is placing a cover screw while grafting the gaps around the fixture so that your graft doesn't occlude the internal aspect of the implant. In this case I used a cortical/cancellous mineralized/demineralized blend allograft, mixed with PRF, to graft the gap. Then I used a PRF "membrane" with a hole punched in the middle to drape over the graft. The hole is there for the healing abutment to go through, but if you undersize the hole you will see the PRF membrane distort as you deliver the abutment through it. The final step here is to suture, and in this scenario I will typically start with a horizontal mattress to pull the buccal and lingual gingiva against the healing abutment and underlying graft as much as possible, then follow with a pair of single interrupted sutures to tuck in the papillae.
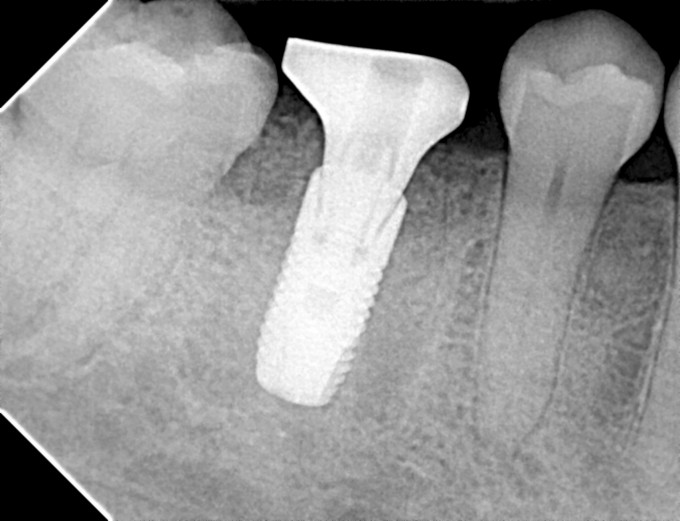
I ended up having to remove the healing abutment after the PA was recorded, as it was clearly not seated all the way. I used the larger bone profiler so I felt confident that was not the issue. Turns out despite the care I took to exclude graft material, one tiny piece migrated into the implant in the short time between cover screw removal and abutment placement. Always double check this as you're moving forward; not fun thinking you're pretty much done and then having to go back. This lead to another minor complication: when I put the healing abutment back on and hand tightened it, the PRF membrane distorted a bit and the implant/abutment complex rotated a few degrees. This is one of the aspects of using the Astra EV that can be technique sensitive; the threads of this fixture are not particularly aggressive. While the bone implant contact is very high in a normal osteotomy, and it is very important to keep the insertion torque value less than 45 Ncm to avoid pressure necrosis, the story is a little different in immediate cases. I used the V drill to finish up the osteotomy as I routinely do in most of my EV cases, and in hindsight this is where I erred. Since the implant is only partly fixed in bone, we need the torque value higher (45Ncm) vs the 20-25Ncm I ended up with after using the V drill. If you place the implant and are exceeding 45Ncm, you can always back it out and alter the osteotomy with the V or X drills, or the A or B drills, depending on the clinical situation. Once the bone is gone, however, there's no easy or predictable way to get that torque value back up. I was concerned that trying to reverse the complex simply to make the healing abutment straight or to make the PRF drape ideal might reduce the stability to where the fixture would fail, so I opted to leave them both.
The patient healed normally and had no further complications, and the referring dentist had no issues restoring the fixture.
I'm hoping the small errors I made with this fairly routine case can help some of you as you adopt this treatment modality and explore the varied uses of Azento and Astra EV.
Jeremy